Pages

Friday, December 31, 2010

Happy New Year!!!

Where did the year go?  I swear the older I get, the faster they go by.  I just want to wish a Happy New Year too all of you and your families.  I hope this year is better than the last, and that they keep getting better every year! xx


Special message to Mr. Type A, I hope you are feeling better Babe, me and the kids can't wait to see you in May/June.  Be safe, and we love you!!!


Mr. Type A is currently living in Afghanistan, all happy thoughts are welcome!  xx

John Rufo
Mr. Type A


My friend Michelle at Shelly's Shabby Shack is having her first give away, check it out!!!
Tammy :)

Calendar Winner

Good morning All!  Just wanted to do a quick post and announce my  WINNER to the calendar give away!

Insert drum roll....Donnie at New Blessings Everyday!!!!  Thanks to everyone who left a comment, I promise more give aways very soon.

Don't for get today is the last day to enter the Everyday Blessings give away!  Good luck.
xx Tammy

Wednesday, December 29, 2010

FREE Printable Calendar from SWITCHEROOm

Hey ya'll just thought I'd share with you this awesome FREE printable calendar from my blog friend Elle @ SWITCHEROOm.

I've even printed one out and framed it for one lucky Type A follower.  I know I already have a give away going on, but what's one more.  Just leave a comment that you follow me and Friday December 31st I will pick a winner.  Spread the news and leave another comment.  Total of two entries per person.

First off, make sure your printer has ink.  Very important step.  I had to run to the local office supply store, as my color was completely empty and my black was gray!  doh.

Install Ink, actually took me a second.  Not a proud moment...sigh.

TA DA, all framed, and ready for you to mark it all up.  The beauty of this calendar is the dry erase marker.  You can write whatever you want and wipe it off.  I printed out all twelve months and they are stacked neatly behind each other in the frame.  Finish a month, just toss it out and the new month is right behind it.

I did have to use this handy dandy tool to cut the sheets down to size, love this thing!

So, I know there can be only one winner, but if you want to make this project or just want the calendar to do your own thing you can get it here @ SWITCHEROOm.  Go show Elle some love! 


PS.  This project was really affordable!  I already had the frame and the printer paper.  So really it was FREE to make too! lol
Tammy :)

linking with:

Monday, December 27, 2010

Everyday Blessings Give Away!!!!!

Yes it's that time.  Time for a give away!  I mean really, who doesn't like to win stuff? 

 Well, Marcie at Everyday Blessings is generously offering one of her 'HAND PAINTED Word Signs' as my first give away! 

 Winner will get to pick the phrase, font and colors of the sign, the signs are typically 6x24 inches.  When you win I will send you Marcie's info so you can contact her directly and design your sign together.  She'll also be able to give you an idea of how long the sign will take to complete and deliver.  Shipping and handling are also included.

Here are few examples of what her work.  

This is the link to the post I did about the wonderful signs she made for me. 

Isn't she talented? 

Okay, so only two rules, that's not so bad?
1.  Sign has to ship to an address in the U.S., so you don't have to live here, but the sign does.  
2.  Must be a Follower of Type A.

How to Enter, and there will be a ton of ways.
1.  Leave a comment that you are a follower
2.  Leave a comment that you are a follower of Everyday Blessings on Facebook. 
3.  Leave a comment with a link back to where you did a blog about the giveaway.  This one will count as two entries!!
4.  Facebook/Twitter about the give away using a link to my post, leave a comment.
(Just to be clear, leave all of your comments on my post page.)

There you have it folks, 6 ways to enter!!!  I will announce the winner on Saturday January 1st 2011, so enter by Friday December 31st 2010.

I can't wait to see who wins and what you have made.  I would love the winner to send me a picture of their sign!

Good luck, and thanks for all of your support!!!
Tammy

Just wanted to let you know the signs are HAND PAINTED, I had put they are vinyl, and they are not.  Even better!!!  :)


I'm going to link these, and cross my fingers it doesn't get deleted!!

Sunday, December 26, 2010

Merry Christmas!!!

I hope everyone had a very Merry Christmas!  I've been crazy busy with the in laws and the kiddos.  Sorry I haven't blogged sooner.

Exciting news!!!  Type A just hit 50 followers, our first milestone.  Thank you all, it means so much to know you all care.  To show you how much I care, I'm going to have my first GIVEAWAY!!!  Check back tomorrow for all the details.

Love Tammy xx


Here's a couple pictures from yesterday of two happy kids!
Lauren was so excited she even let her brother help her unwrap her presents!

Connor had a heart attack when he found the Millennium Falcon!

Wednesday, December 22, 2010

Look Ma, Two Hands!

Check out my GIVE AWAY HERE!!

 Check out the wall above the leather chair, empty.  Until today when I added an art project I've been working on, since May.  Really, like May or June.  Funny how you start something and then something else pops up, that is more fun and you stop working on it....story of my life really.  This project turned out cute and I love it, but I don't see me doing another, EVER!


Ta Da, hand trees, yep that's what I said....hand trees. 


Here they are close up.  Let me say, I love mod podge, you can do so much with it.  The flip side, it's so dang sticky and messy, and I hate being covered in it.  If you feel the same way this project may not be for you. 

First I wrapped two 16x20 canvases in burlap, I used hot glue to stick it to the back side.  Then I used my sizzix to cut out a zillion leaves in NINE different fabrics.  Okay that may be over kill, but I like variety.  You can use as many different leaf fabrics as you want.  Then I traced my kiddos hands on to fabric and cut them out.  This is where the mod podge comes in to play.  I used it to glue down the hand trunks.  I also cut a different fabric for grass.  This a close up of Lauren's trees.

When you glue the trunks down, don't do the finger section.  Now you want to glue on tons of random leaves, when the leaves are done you can glue the finger section down.  Definitely glue the fingers on top of the leaves, or you won't see the hand, and this is what really make the project cute.  This is Connor's trees close up.

I'm very happy with how they turned out, I kinda feel like they are missing something.  Suggestions are welcome, thanks for stopping by!

Tammy :)

Linking with:

Tuesday, December 21, 2010

Final Christmas Touches....Pinky Swear!

I'm not sure what came over me, stroke maybe, but I just felt like something was missing from my Christmas decor.  I gave into my crazy side and went to Dollar Tree and Hobby Lobby.  I really love these stores.  I wish Hobby Lobby was closer, but it's probably better that it isn't...or I'd be in trouble! 


Loving this little vase.  The vase and candlestick holder are both from Dollar Tree, I bought two of each, $4.  A little E6000 glue later and they are perfect.  I purchased 12 of these gold ornaments at Home Depot for $6, so for $10 I have two of these babies, one on either side of the mantel.


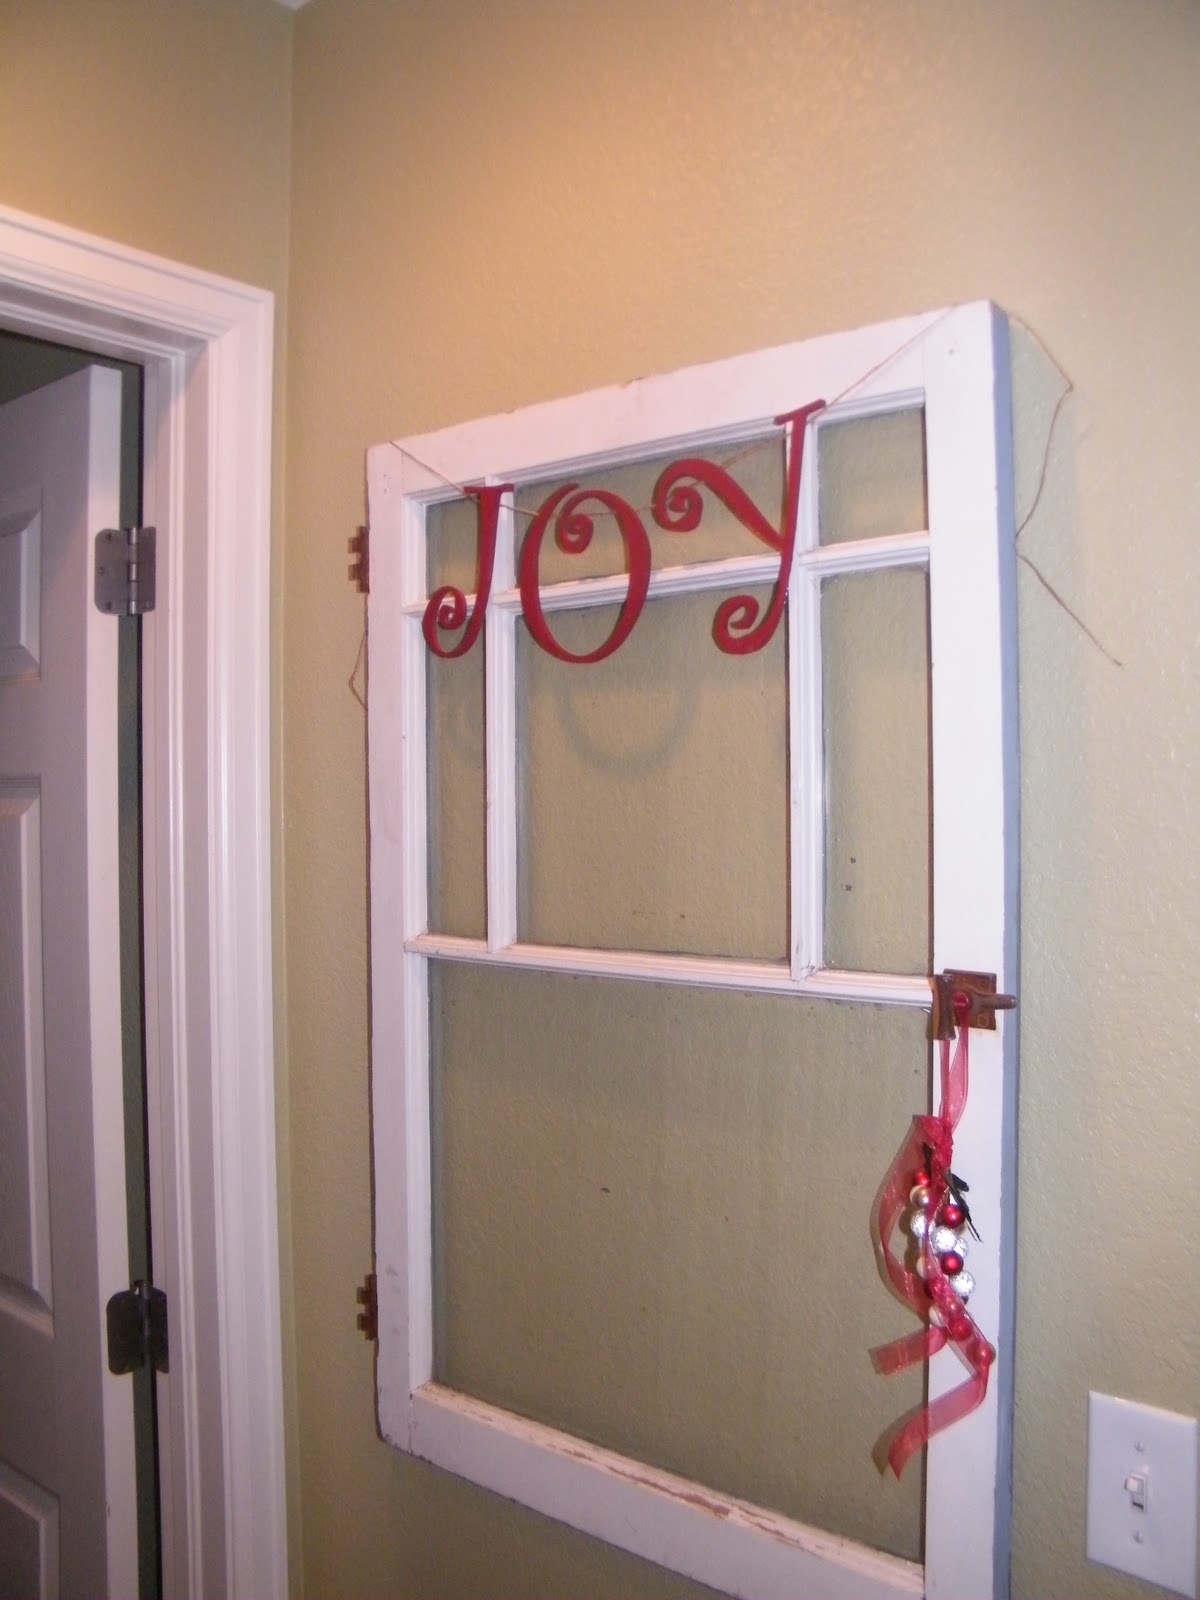
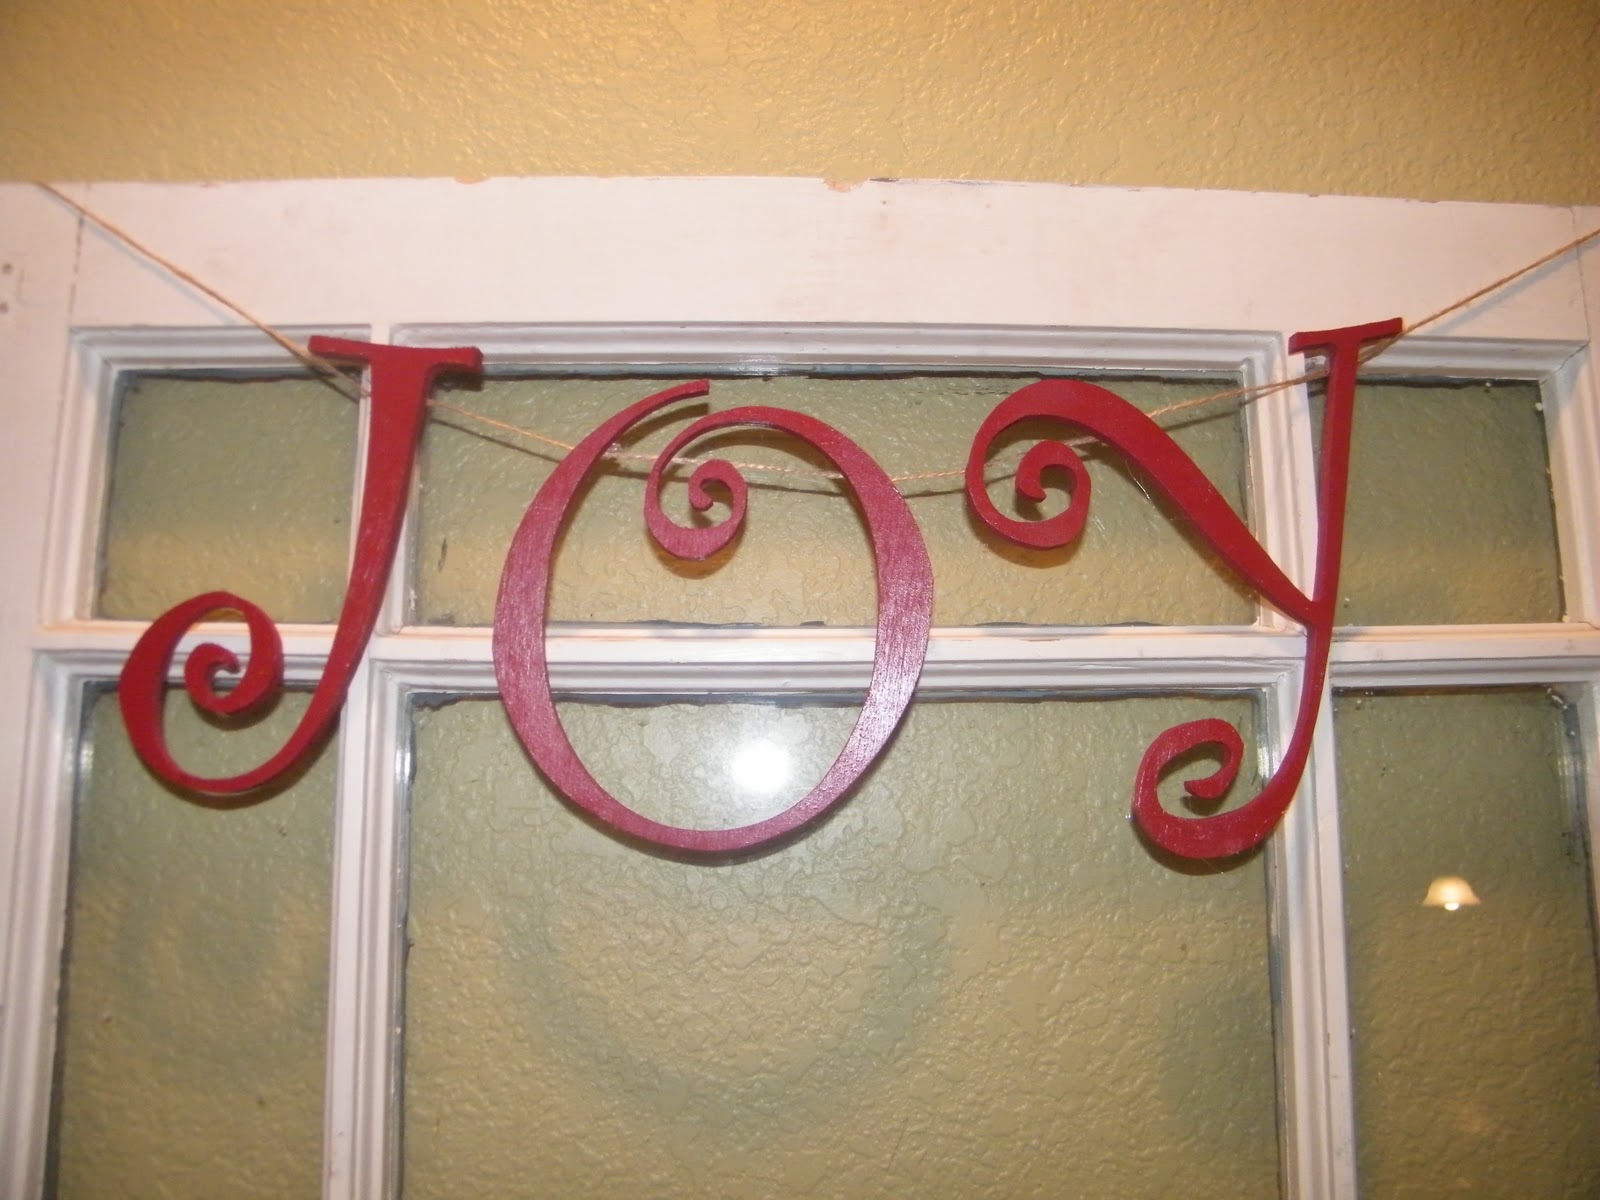
 Then I headed over to Hobby Lobby and picked up these individual letters, enough to spell JOY and NOEL. 

 I added some Colonial Red by Rustoleum, my favorite red, perfect for Christmas.

 I didn't prime them, and was surprised they only took two coats to cover. 

I used a little hot glue and attached them to some twine.  I hung one here and then one on the mantel.  I just love the pop of red on the white window. 


Again some more hot glue and twine, I hung this one off the stocking holders.


Last but not least, I made some snow globes for family.  Really easy, but it does take a little time, this is not a project you can rush.   I bought some glitter, liquid glycerin, ornaments, mason jars and ribbon.  You'll also need some hot glue and epoxy.

This was my first step, mixing the epoxy and gluing the ornaments to the tops of the mason jars.  I let them sit over night to make sure they were good and set up.   If you make these yourself, make sure you try to put the ornament into the jar before you buy them.  Not all ornaments will fit, lucky for me I did this at the store, but it wouldn't have been unlike me to get home and be mad that I hadn't....

Next step, fill the jar with water, about an 1 1/2inches from the top.  Add some glycerin, keeps the glitter from clumping, and glitter.  This is the globe my daughter wanted for herself, so she picked pink glitter, and the angel with the guitar.  Her love of pink and guitars cracks me up.  Then you screw the lid on and hot glue around the edges to water proof.  I left it in the position for another 6 hours before I flipped right side up.

 Finally I added some ribbon to hide the hot glue.  One disclaimer, don't shake to vigorously or the ornament may come off, and don't press down on the lid, it may have the same effect.  Let's just say 'been there'! 

Thanks for stopping by, Merry Christmas.

Tammy :)

Saturday, December 18, 2010

Paper Cone Christmas Tree Tutorial

When I was making this tree, I should have taken pictures of the process, but I did not.  Which you will soon find is not unlike me.  I keep saying that I'm new to the blog world, but at some point I have to come to terms with the fact that I'm forgetful.  VERY forgetful!  


 Here is a list of the items you will need, I borrowed all the images from the web. 


This paper cutter was a life saver, you could use scissors, but if you want a uniform cone this is the PERFECT tool. 


 You'll also need paper, not as much as you think, but 16 pieces of 12 x12 inch paper should do the job, with a little leftover.   I used the paper cutter to cut each piece into 3 x 3 inch squares.  16 per page, 256 squares total, and the tree took about 240 to complete.  This was my favorite part, picking out my papers.  I used four different kinds, but you can use as many as you like.  Go crazy!  One reminder, the stiffer the paper the harder it is to roll. 


I used two rolls of tape, because I bought mine at the dollar store, and apparently they don't have as much tape on them.  One roll should do the trick, provided it is bigger than the dollar store variety.  I recommend matte, I used glossy and you can see it on each cone.  If you don't know how to roll cones check out That's What She Said, her cones are great!  (She used glue rather than tape, I like the tape, it works faster.)


Hot glue gun is a must have, this is how you attach the finished cones.   I used a low temp gun, but some of you die hard crafters can use a high temp one, but I'm too chicken.  The low temp one is hot enough!  Trust me you'll burn yourself. 


Make sure you have lots of glue on hand too, It'll take 4 or 5, maybe even 6 sticks.  Mine are the mini, so if your sticks are bigger it would take less.  


Lastly a cone, I recommend a cardboard one, you can get them at Hobby Lobby.  I'm not really sure who else sells them, Joanns and Michaels may have them too, but I got mine at Hobby Lobby.  Bring a coupon if you have one, I didn't and had to pay $8.  Assembly is kind of labor intensive.  PK Glitz Inc has a great tutorial for these trees, but on a much smaller scale.   You want to start at the bottom and work your way to the top, stopping to make sure everything is level. 


Ta Da, the finished project. 

I hope I didn't confuse you guys to much, if you have any questions please leave me a comment and I promise to get back to you.  It's not a hard project, there are just a lot of steps.  The best part of this project is making it your own.  Have fun!  I can't wait to see what you create!


I'll be linking with:

Thursday, December 16, 2010

Sticker Shock!

 I was browsing the net one night and came across these.  LOVED them right away, and knew right away I was NEVER gonna own them.  With a sticker price of $495, I was more than shocked, I was a little mad.  I mean really, doesn't every one deserve the chance to own great stuff?   Then it hit me, I can have this, and I can have it my way!

Of course if you want to buy this piece all you have to do is go here and it's yours, I bet they charge shipping too.


Her is MY version!  I contacted a friend on Facebook that creates some of the best signs, and this is what I got!!!  Her name is Marcie and she is so talented.  I told her what I wanted, and after a little trial and error, this is the finished result.  I originally picked the wrong font, it just didn't work.  Marcie was a totally pro about it changed it for me.  Working with her was great, she sends you pictures as she goes, there are no surprises, just lots of happy!  I like happy.

Curious about what is says?  This is what sold it for me really, I knew when I read the translation (I don't read French, but love the way it looks.) exactly where I would hang it.  When I say me, I mean the handy man Blaine!   Anyway, it says 'Idleness is the Mother of all Evil', and it hangs right next to my craft hutch.  My sweet reminder to craft more. 
You should check Marcie out at Everyday Blessings, she can do anything!  Go show her some love.

Thanks Marcie, you are the best sign maker ever, and I had a blast working with you.  I can't wait for our next project.

Tammy :)


Linking with:

Wednesday, December 15, 2010

A Room Fit For A SuperHero!

My son Connor had been asking me and hubby to 'color' his room blue forever, when we painted it 18 months ago.  Daddy picked out the Transformers bedding, we had just seen the second movie and I think Daddy wanted the bedding more than Connor, and definitely more than me.  I don't know about you, but I really dislike all things character.  


This is his room last fall. 


Here it is now.  I got rid of his box spring when I bought this bed of Craigslist, isn't it great!  It didn't even need paint, SCORE!  I love to refinish furniture, but sometimes it's nice to just put it in the room as is.  I also bought him that great little dresser this summer, and I did refinish the lamp.  It was brown, and pretty ugly, but only $10, so worth the spray paint.


You can kind of see his rug on the other side of his bed, and now he has a book sling and a cushy pillow to relax while reading.  Which really translates to where he plays his DS!  Notice no more Transformers bedding!  I scored this quilt and sham set for $42 at Marshalls.  He has more pillows at the foot of his bed, they are ones I had made for him, so they are really special to me.


I also painted the frames on the wall, one is a magnet board and the other is a chalkboard.   The bookcases replaced the wire one, I had a neighbor build them from some plans I found online and then I painted them myself.


Thanks for stopping by and checking out little man's room. 

Tammy :)

Saturday, December 11, 2010

Say it with Me...FREE TABLE!!!

  Okay, so the title just about covers it.  It was on craigslist for $100, and some how by magic, it was GIVEN to me.  Yep just like that.  Well okay, I did contact them to see if they would take less and I did go see it.  Then I decided I really wanted it, but with Christmas right around the corner, I should wait.  Well the owners, great people, decided they wanted to park in their garage more than they wanted my money!!!!!  Get this, the hubby even delivered it!  I should point out they live around the corner, but still, FREE and DELIVERED!  Merry Christmas to me.  lol


This the base, kind of a distressed cream color.  Very nice actually, all I did was clean it up, the color stayed.


However, the top was a different story, it had to be stained. (American Walnut? I'd have to look at the can, but it was Walnut something and water based.  I can tell you this for sure, I don't see any more water based stains in my future.)  I couldn't, really I couldn't live with the 80's oak.  In the top right corner you can see a glimpse of the new dining chairs, I'm in the process of removing 8 zillion staples, and then I will refinish them and add them to my dining room.   (of course I'm still on the hunt for the perfect pneumatic upholstery 1/2 inch crown staple gun.)


*Giggle*  She makes me very HAPPY!  I say this about all the pieces I refinish, but she is pretty close to perfect.   Maybe it's the FREE and DELIVERED factor.   When if  I ever finish the chairs, it'll be perfect....


I'm still debating about refinishing the piece in the corner here.  What do you think?  What color?  I'm done with stain for a while, so please don't suggest it!  lol  And no green, I think I have enough in this room.  REALLY!


As always thanks for stopping by! 

Tammy :)

I'll be linking with:

LinkWithin

Related Posts with Thumbnails