I was searching blog after blog the other day looking for an easy, adorable, affordable Christmas present. I usually only give gifts to my children, but this year since I've become a do it yourself-er, I decided I would like to make a few gifts. That's when I cam across Shanty2Chic's blog, and found these picture frames, and I knew even I could make these. Thanks for the great idea Whitney and Ashley!
I bought the clips at Walmart, just like the Sisters. The base which is an oval piece of wood and a wooden candle stick, I bought at Hobby Lobby, again I pretty sure I bought all of my supplies at the same stores as Whitney and Ashley. I did not use 2x8 cut 10 inches long, I opted for 2x6 cut 8 inches long. I wanted something a little smaller, but I think next time I will go bigger.
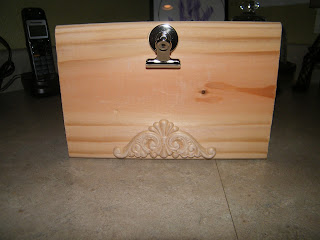
Here is a picture of the top section, with the clip and applique glued in place.
This is the oval piece and candle stick glued together to make the base.
Here they are attached to each other. I also made them vertical and horizontal.
This the glue I used, and I don't think I will use it next time. I know the Girls used it, but it takes a while to set up and smells awful. I might use something of the Gorilla variety next time.
I bought quite a few different colors of spray paint, I HEART spray paint. Especially Rustoleum, don't get me wrong I like Krylon too, but it really doesn't cover as well. I found with this project I will have to prime the frames that I want to paint ivory. I didn't prime the walnut or red ones, and it only took two good coats to cover.
Love the walnut brown ones, these are all MINE! (okay so they aren't all gifts! I had to keep a couple for me?)
These colonial red ones are for the best Mom in the World! Yep, mine!
I didn't distress mine, but you can if you want. I just love how the Santa picture looks in this frame.
I have two more in the garage primed and ready for paint, yep Krylon Ivory!
If you guys make some send me a picture please, I would love to see what size/colors you choose.
Happy Crafting!
I'll be linking up with the following:


8 comments:
These are super cute! Love the idea! I know I will be giving this a try. The sky is the limit with color. Your kids are very cute! I have a strawberry blonde. Lots of fun!
Have a great night!
Michelle
Hi Tammy!
I tried to email you but it came back no reply. Ugh! Anyway, I have a booth in Ft. Collins Hgwy 287. It's called A & J's Antiques. They have over 100 dealers. You should stop by if you are ever in the area. Great place to find unique things. I'd say it's priced well, also. I find most of my things at Thrift stores, Craigslist and Flea Markets.
Nice to have found your blog and look forward to getting to know you.
Michelle
This is a brilliant idea.
Thanks Val, I wish it had been mine, but the ladies over at Shanty 2 Chic get all the credit!
Great project, Tammy!
Tammy, I've featured this project as part of my post "Bookmarked on the Boardwalk". You can see the post here: http://www.bobbypinsboardwalk.com/2010/12/bookmarked-on-boardwalk.html. Thanks for such a great tutorial!
These are so cute. I had seen these at Shanty 2 Chic and thought I would like to try them. Glad you did they look great!
sweet. thanks for passing it along, and for the tip about best paint, and the glue.
blessings
barbara jean
Post a Comment