


Hi there! I am so excited to be back as a guest poster at the always fun blog Type A Decorating. Tammy, thank you for including me in your holiday guest series!!
Today, I'll be sharing ideas for wrapping your gifts quickly, very easily, and totally for free.
Today, I'll be sharing ideas for wrapping your gifts quickly, very easily, and totally for free.
My name is Jenny and I named my blog after the street I call home, Simcoe Street. If you want to visit me, my blog is right here. Come by any time!
This is me:

I am one of those people who LOVES Christmas and starts to really think about decorating as soon as Halloween is over. Since Thanksgiving in Canada is in early October, all of November and December are about pre-Christmas fun. I live in a tiny 1000 square foot home in the heart of the city, but we find lots of ways of squeezing in Christmas cheer in our little hideaway.
Of course, like many people out there, the holidays can also be very costly. This year, we're making extra efforts to be cost conscious. Today, I'll show you how we have spent ZERO dollars wrapping our gifts while still creating pretty parcels. It is super quick & easy, and you can totally do it too.

I'll give you the complete how-to, but here's where to start. Gather supplies like brown paper lunch bags, paper shopping bags (brown or any colour), ribbon scraps from other projects or gifts you've received, a sharpie or other inky pen, a stapler, stamps & ink if you have them, and anything that can be used as an embellishment (more on that in a moment). Here's some of my supplies:

The trick to this is to think outside the box and use whatever you happen to have lying around...
For example, I had purchased a few new sweaters at Esprit and, before discarding the tags, thought they could be repurposed as easy gift tags. I gave them a quick trim, and voila (the top one is my gift tag, the bottom one is the store's original tag):

Later, I used stamps and a sharpie to dress 'em up. Here's how it looked mid-process.

But let's get to wrapping. This is part 1 of my ideas-to-wrap-your-gifts-for-free. I have a bunch of other ideas, but they'll have to wait until I do some more shopping. Today is wrapping tiny things, like ornaments and bath sets. Let's get to it...
 To wrap a few simple small gifts I made use of some regular brown paper bags (the kind you use for lunches and such). Brown paper bags, if you don't already have them on-hand, are easily the cheapest gift bags you will purchase. You can find them in big multi-packs at the grocery, craft or dollar store.
With those and some embellishments, along with my trusty alphabet stamps I got to work [If you wondered, the stamps I have can be purchased here, and I love the font style and use 'em on everything (like the napkin rings I made for a dinner party here) making them well worth the price for me, but you can also find cheaper ones, use a stencil, or just freehand it].
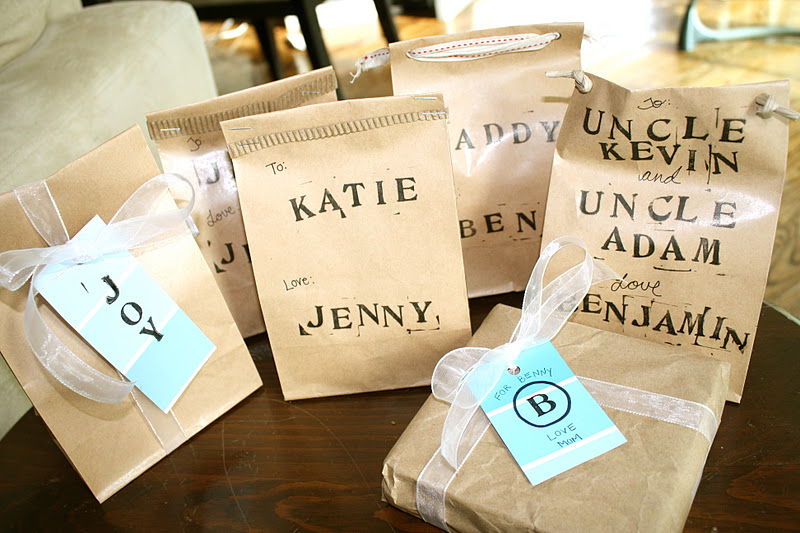
For the first present, I folded the bag to size for the gift inside, then used a hole punch to punch two holes. Looking at the picture below, (1) I used a pen and stamps to write on the bag. (2) I added an "xox" detail on the back with my stamps. (3) I used a scrap of ribbon from a birthday gift I'd received recently to pretty things up a bit. Since there wasn't enough to do anything fancy (or even tie a bow), I simply laid the ribbon flat in front and tied two knots in back. (4) All done!

Here's how it turned out:
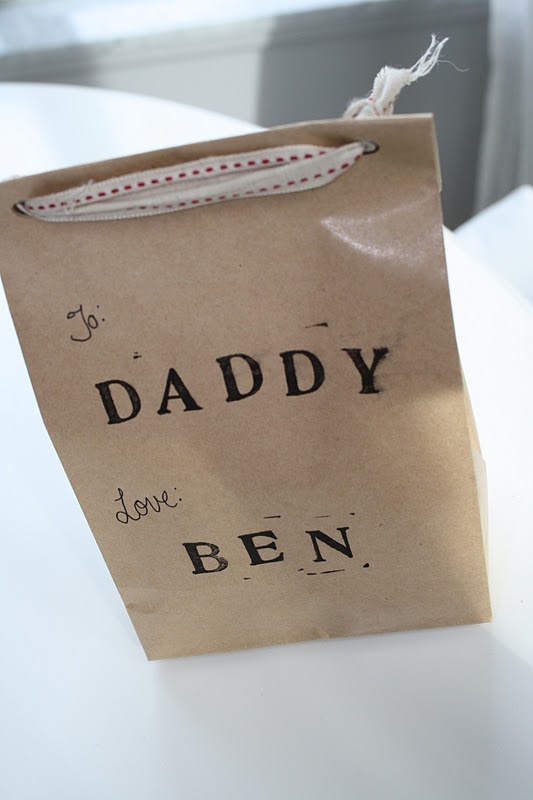
Next, I took the leftover handle from a paper shopping bag (just snipped the handle right off) to embellish a similar brown paper bag gift.

This time I knotted it in front. Again, I used my stamps with a little freehand cursive to mix things up. The best part is that the "mistakes" add to the charm, so there is no need to try too hard when you're doing these.

I had a few more little things to wrap (like this set of mini True Blue Spa goodies), and this time decided to use a coffee collar from the latte I'd treated myself to as embellishment. Seriously, you can turn anything into gift wrap with the help of a stapler.

All I did here, as you can probably tell, was cut the coffee collar into strips and stapled the strip around the top of the bag to add a little bit of texture and interest. Easy as pie. I varied the size of the strips on other presents. It doesn't bother me at all that you can see the staples, but if it bugs you a glue gun or strong double-sided tape is your best friend. You could also choose, instead of a coffee collar, to use ribbon, a strip of tin foil glued down, a bright strip of leftover scrapbook paper, pipe cleaners, a book page, strip of newspaper, or whatever else you find lying around.

You could also use a leftover piece of ribbon and simple shipping tag (if you don't have them, $3 or so will get you a giant pack of them at Staples), like this:

Or even a paint chip trimmed and hold-punched to become a fast & easy gift tag:

Paint chips are great for making fun little trees on gift tags and cards, too.

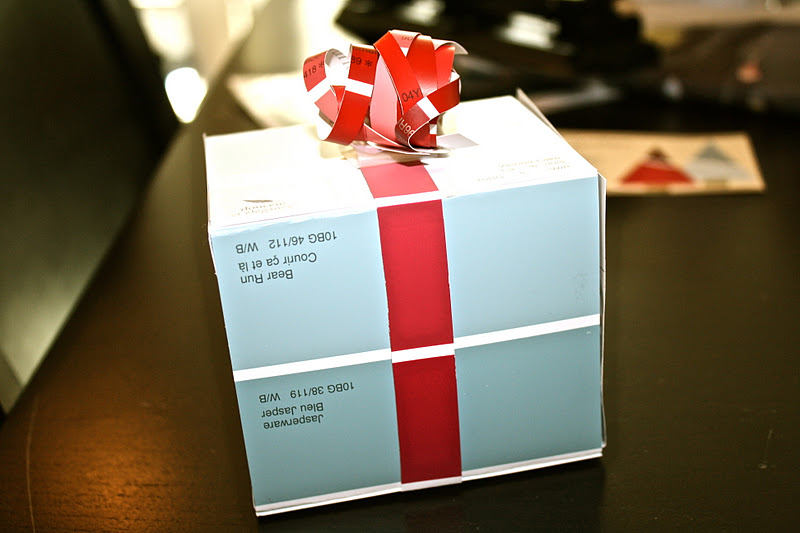
And for making cute little ornament boxes. I'll share tutorials on my versions of paint chip boxes soon, but here's a look at one easy version:
Or maybe you just want to beautify a brown paper package. A paint chip works well and unlike ribbons and bows keeps it feeling masculine. You can't totally see in the photo, but a few similar paint chips are used to wrap all the way around the package. Just secure with tape and you're done!

Or you can add a pop of colour by using part of one as a gift tag if you want something truly easy to do.


For bigger items, cutting up old shopping bags is my go-to freebie gift wrapping method. For instance, this bag
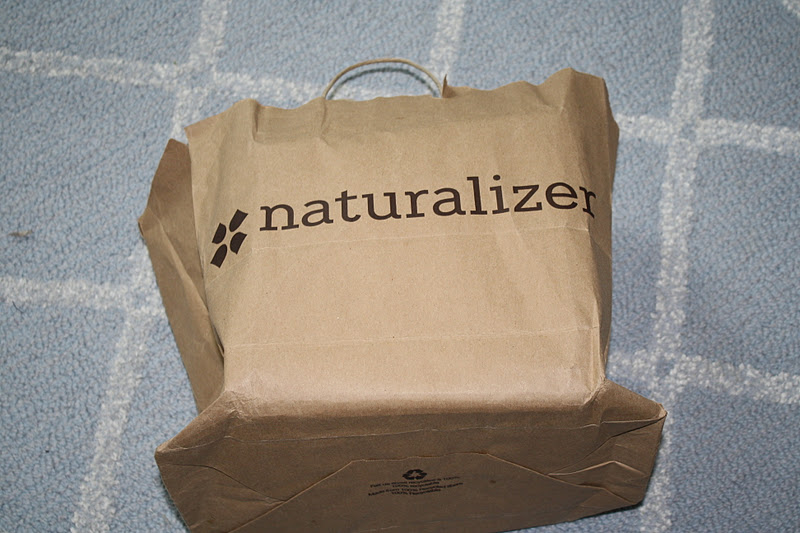
was cut & used to wrap this little set (yes, I was wrapping on my stove -- I have no idea why)

Finished off with some more stamp action and a recycled piece of ribbon.

I also reuse things like tissue paper (in addition to the more obvious re-use of gift bags and such).

This present (above) is wrapped in a few layers of tissue paper. I covered a lime green sheet in plain white to subdue the colour a little. I then used one of these cheapie shipping tags (if you don't have them, cut a piece of cardstock) and snipped part of a pretty birthday card I'd received but no longer needed to make a tag. A piece of ribbon from a present I'd received finished it off.

And that is how I've been doing my gift-wrapping for free in the spare minutes I find while my baby is napping. Quick, cheap, and incredible easy. I'm hoping that these ideas will spark some of your own. Remember, you can really re-use just about anything to dress up a present. Presentation is everything and looks do matter (when it comes to gifts, anyway), but it needn't be expensive.


P.S. There's lots of other ways we're trying to save our pennies, and from the gifts we're choosing to give (or make - like these DIY sentimental ornaments made from wedding invitations that cost us 80 cents in supplies -- more on them here)

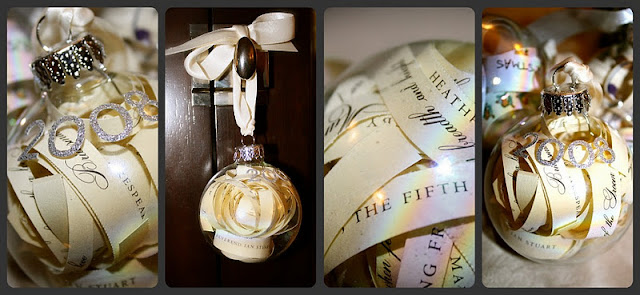
just a little creativity is helping us stretch our dollars. Plus, it's fun :)
Wishing you all a very happy holiday season!!
Big thanks to Tammy for having me and the other holiday series bloggers.
Love Jenny xo


7 comments:
Great Gift wrapping idea!I love that you went green!!!thanks for sharing!!!Ur baby is very cute!
Love all the ideas! The paint samples are cute like this.
What a great way to get rid of the little bits and pieces of stuff around the house!
www.onedogwoof.blogspot.com
Wow! Such great ideas! I am absolutely loving the paint chip gift tags!!
Love all of these ideas! I'm sure we all have an abundance of paint chips!
-Diana
I love the simplicity! I'm going to be using plain brown paper to wrap gifts this year also.
very cool. what great ways to reuse things that you already have!
Post a Comment